Snel antwoord
Solar panels don’t just soak up sunlight—they turn it into electrical voltage that powers your home. Most residential solar panels put out between 30 to 40 volts in typical conditions,…
Solar panels don’t just soak up sunlight—they turn it into electrical voltage that powers your home. Most residential solar panels put out between 30 to 40 volts in typical conditions, but you might see anything from 18 to 90 volts depending on the panel and cell setup. Wrapping your head around these voltage levels isn’t just for engineers. It’s what separates a system that runs smoothly for years from one that fizzles out early or just doesn’t deliver.

Here’s something most folks don’t realize: voltage isn’t some magic, unchanging number. Your panels crank out different voltages all day long as the weather changes. If you wire several panels together, the voltage changes again based on how you connect them. And that’s before you even start matching panels to batteries or inverters.
If you get voltage wrong, you risk wasting energy or even frying your equipment. But once you know the three main voltage types and what affects them, you’ll make much better choices about your solar setup. It’s not rocket science—just a bit of know-how.
Key Takeaways
- Solar panels put out different voltage types: open circuit voltage, maximum power voltage, and nominal voltage. These matter for making sure your system works together.
- Temperature and how you set up your panels play a big role—higher temps cut voltage by about 0.45% per degree Celsius.
- When you calculate voltage right, your panels, inverters, and batteries all get along, and you get the most energy possible.
Core Concepts of Solar Panel Voltage
Solar panel voltage is just the electrical “push” that photovoltaic cells create when sunlight hits them. Each cell usually gives you about 0.5 to 0.6 volts. String a bunch of them together in a panel, and you’ll see 30 to 40 volts from a typical home panel.
What Is Solar Panel Voltage?
Voltage is just the difference in electrical potential between two points in your solar setup. Imagine water in a pipe—higher voltage is like higher water pressure, pushing electrons through your wires.
One solar cell makes about 0.5 to 0.6 volts. Not much, right? That’s why manufacturers wire up a bunch of cells in series inside a panel.
Connect 60 cells in a row, and you’ll get around 30 to 40 volts. If you use 72 cells, you’re looking at 42 to 46 volts. The more cells in series, the higher the voltage climbs.
Your solar panel actually has three voltage ratings you should care about. Open Circuit Voltage (VOC) is what you’ll see when nothing’s connected—usually between 21.7V and 43.2V for home panels. Maximum Power Voltage (VMP) is lower, typically 18V to 36V, and it’s the sweet spot for efficiency. Nominal voltage is more of a label, like 12V or 24V, to help match panels with batteries.
Voltage and Current Relationship
Voltage and current work together to decide how much juice your solar panel can give you. Voltage is the “push,” and current is the flow of electrons (measured in amps).
Power is simple: Power (Watts) = Voltage (Volts) × Current (Amps). If your panel gives you 30 volts and 10 amps, that’s 300 watts. Easy math.
Here’s something cool—voltage doesn’t swing a ton when clouds roll in, but current drops fast. In partial shade, voltage might dip 10-15%, but current can fall by 50% or more.
Temperature makes things weird too. Voltage drops about 0.45% for every degree Celsius above standard test conditions. Current creeps up a little when it’s hot, but the voltage drop usually wins, so you end up with less power overall.
How Solar Panels Generate Voltage
Your solar panel creates voltage thanks to the photovoltaic effect in silicon cells. Sunlight hits the cell, and photons knock electrons loose from silicon atoms. Those free electrons want to move.
Each cell has two layers of silicon—one positive, one negative. This creates an electric field at the junction. When electrons hit this field, they get pushed in one direction, making voltage.
The trick is in how they treat the silicon. Manufacturers add impurities to create a positive (p-type) and negative (n-type) layer. The magic happens at the junction, where voltage generation starts.
More sunlight doesn’t really boost voltage, but it does free up more electrons, which means higher current. So your panel’s voltage stays pretty steady through the day, but power output jumps around with the sun.
Types of Solar Panel Voltage Ratings
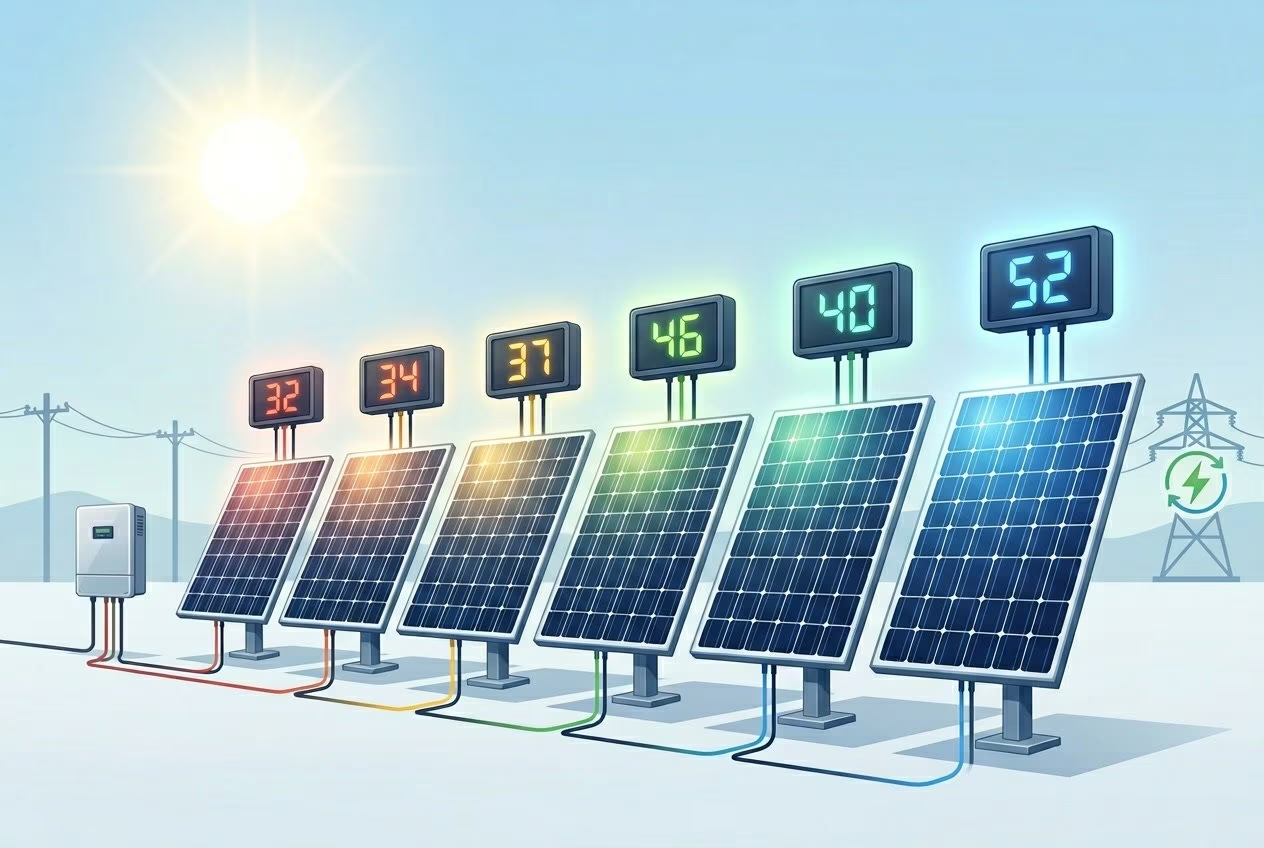
Solar panels give you three main voltage numbers, and each one tells you something different about how your panel will behave. You’ll want to know all three if you’re planning a system.
Open Circuit Voltage (Voc)
Open circuit voltage is what you’ll measure if your panel sits in the sun with nothing hooked up. No current flows, so you see the max voltage the panel can make.
You can test this with a basic multimeter. Hook the leads to your panel’s terminals on a sunny day. Most home panels show between 21.7V and 43.2V, depending on the number of cells and how they’re wired.
This number matters because it tells you what charge controllers and inverters your setup can handle. If your Voc is higher than your equipment can take, you risk damaging expensive gear. You’ll find this spec on the back of the panel and in the datasheet.
Temperature plays a big role here. Cold weather actually bumps up Voc, while heat drags it down below the rated value.
Maximum Power Voltage (Vmp)
Maximum power voltage is where your panel delivers the most watts. It’s not locked in like Voc—it shifts with sunlight and whatever’s pulling power from your system.
Your panel can run at lots of voltages, but only one spot gives you peak power at any moment. For most panels, that’s between 18V and 36V.
Modern charge controllers use MPPT (Maximum Power Point Tracking) to chase this ideal voltage all day. The controller tweaks the load to keep your panel at Vmp as conditions change. Without MPPT, you can lose 20-30% of your potential energy because you’re not always at the sweet spot.
Vmp usually sits at 70-80% of your open circuit voltage.
Nominal Voltage Explained
Nominal voltage is just a label for what kind of system your panel matches. You’ll see “12V,” “24V,” or “48V” panels, but those aren’t the exact voltages you’ll get.
This makes matching components easier. A “12V” panel usually has 36 cells and puts out around 18-20V at Vmp, which is what you want for charging a 12V battery bank. A “24V” panel doubles that cell count.
The nominal rating doesn’t say much about actual performance. It’s more like a handy shortcut for system design. When you buy batteries, inverters, and controllers, just make sure they all use the same nominal voltage so everything works together without headaches.
Factors Influencing Solar Panel Voltage
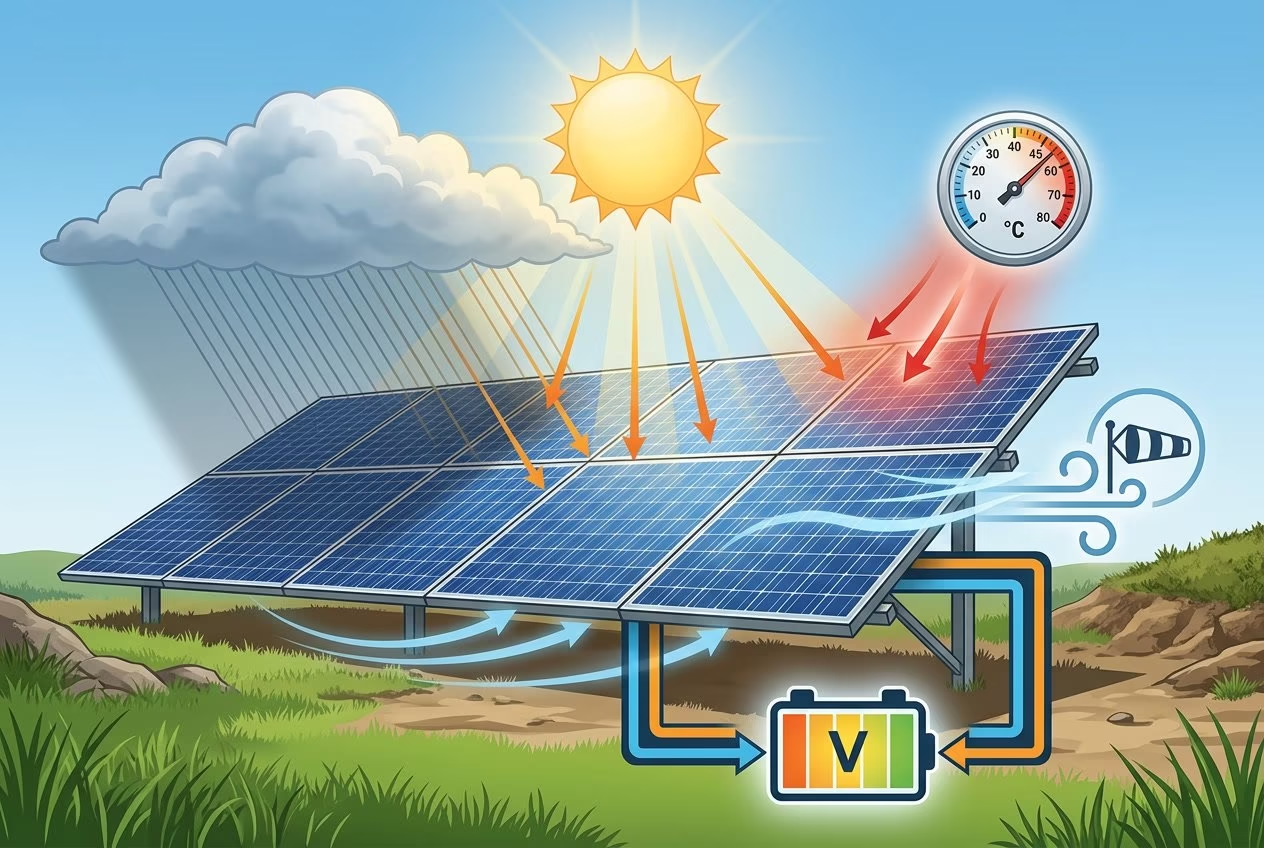
Your solar panel’s voltage output isn’t set in stone—it changes based on how the panel’s built, the temperature around it, and what’s going on outside each day.
Panel Design & Materials
The way you design your solar panel sets the baseline for its voltage. A standard 60-cell monocrystalline panel usually puts out an open circuit voltage around 36-40V. If you jump to a 72-cell version, you’ll see closer to 42-46V. The more cells you’ve got, the higher the voltage output goes.
Monocrystalline panels run on single-crystal silicon wafers, so they’re more efficient (think 18-22%) than polycrystalline panels (which tend to hit 15-17%). That difference shows up in efficiency and in voltage stability under all sorts of weather. Every photovoltaic cell adds about 0.5-0.6V to your total output, so it adds up fast.
But here’s the catch: manufacturers rate panels using standard test conditions (STC)—that’s 25°C, 1000W/m², and a set light spectrum. In reality, your voltage will bounce around these numbers depending on what’s happening outside.
Impact of Temperature
Temperature fights your voltage output in sneaky ways. For every degree Celsius above 25°C, you lose roughly 0.3-0.5% of your voltage. That’s your panel’s temperature coefficient, and you’ll find it in the spec sheet.
On a blazing summer day, your roof might hit 65°C. Suddenly, you’re looking at a voltage drop of 18-20V on panels that are rated at 40V in the lab. That’s not nothing. Monocrystalline panels usually handle the heat better—think -0.3% to -0.4%/°C—while polycrystalline panels drop a bit more (-0.4% to -0.5%/°C).
Oddly enough, cold weather actually boosts your voltage. You’ll get higher voltage on a frosty winter morning than on a sweltering summer afternoon, even if the sunlight’s the same.
Lighting and Environmental Conditions
Your solar panel’s efficiency changes all day as the sun moves. Direct sunlight at noon gives you max voltage. When clouds roll in, both current and voltage drop, but current takes the bigger hit.
Partial shading messes with the voltage across your panel. Even a tiny shadow from a branch can drag down the whole panel, since the cells work in series. Those shaded cells stop generating and start acting like resistors.
Dust, snow, and random debris block sunlight from hitting your cells. That means less photon energy gets converted. If your panel gets really dirty, you might lose 5-25% of its voltage capacity—depends on how much grime you’ve let build up.
Understanding Voltage in System Design

The way you connect your solar panels decides your system’s total voltage and current. Go with series connections to boost voltage, or parallel wiring to ramp up current. The best setup depends on what your inverter needs and what you want from your install.
Series Connections
If you wire panels in series, you connect the positive terminal of one to the negative of the next. This adds up the voltage for each panel, but the current stays the same as a single panel.
Let’s say you’ve got three 36V panels in series—you’ll end up with 108V total. The current? Still whatever a single panel puts out. Most home systems use this trick to reach the high voltages modern inverters want—usually somewhere between 300V and 600V for string inverters.
But here’s a heads-up: a series string is only as good as its weakest panel. Shade or damage one panel, and the whole string suffers. Temperature swings hit harder in series too, since voltage drops about 0.45% for every degree Celsius the temperature rises.
Most installers stick with series for rooftop setups. You use fewer wires, and thinner ones too, since current stays low. That saves on material costs and keeps things simple.
Parallel Connections
Parallel wiring means you tie all the positives together and all the negatives together. Voltage stays the same as a single panel, but now you add up the current from each one.
Three 36V panels in parallel? Still 36V, but triple the current. This approach works when you need a specific system voltage—like for a 12V or 24V battery bank—but want more total power.
Parallel setups shrug off shading better than series. If one panel underperforms, the others keep cranking out power. The trade-off? You’ll need thicker wires to handle the extra current, which ups your costs a bit.
Small off-grid systems (think RVs or boats) often go with parallel wiring. If you’re running a 12V system, it just makes sense to wire your panels in parallel.
Choosing the Right System Voltage
Your inverter specs tell you what system voltage you need. Grid-tie inverters usually want 300V-600V input, so you’ll wire your panels in series to hit that range.
Battery-based systems play by different rules. A 48V battery bank needs panels set up to deliver a bit more—usually 60V-70V—for proper charging. Lower voltage systems (12V or 24V) work for small jobs, but they get inefficient at higher power because you lose more energy to current.
Common System Configurations:
| Application | Typical Voltage | Connection Type |
|---|---|---|
| Small RV/Boat | 12V-24V | Parallel or series-parallel |
| Home battery backup | 48V | Series-parallel |
| Grid-tie residential | 300V-600V | Series strings |
| Commercial systems | 600V-1000V | Series strings |
Higher voltage systems waste less power in the wiring. That’s why the big commercial and utility projects push for 1000V or even 1500V. Just remember, your local codes set the max voltage you’re allowed to use.
Solar Panel Voltage and Energy Storage Solutions

Getting your solar panel voltage right is crucial when hooking up to batteries and storage. The voltage needs to match what your gear can handle, and the right controller keeps everything safe.
Solar Charge Controllers and MPPT
Your charge controller sits between the panels and your battery bank, regulating voltage so your batteries don’t get overcharged.
You’ll usually pick from two types. PWM (Pulse Width Modulation) controllers are basic and cheap, but they only work well if your panel voltage matches your battery voltage. MPPT controllers (Maximum Power Point Tracking) are smarter and more efficient.
An MPPT controller grabs extra voltage and turns it into more charging current. For example, if you’ve got a 40V panel charging a 12V battery, MPPT makes sure you don’t waste that extra voltage. This can boost charging efficiency by 20-30%, especially on cold days when your panels run a little higher.
Most MPPT controllers handle 18V up to 150V (sometimes 250V) for home systems. Always double-check your controller’s max input voltage before wiring panels in series—go over, and you could fry it.
Input Voltage Range for Power Stations
Portable power stations and solar generators each have their own voltage window. If you go outside that range, your device won’t charge—or you might even wreck it.
Most portables accept 12V to 30V input, but some bigger ones can handle up to 60V or even 150V. You need to match your panel setup to fit within that window.
Here’s how it plays out: a single 12-volt solar panel works for small power stations. Two 20V panels in series (40V total) might be too much for compact units, but they’re perfect for larger stations. Always check your station’s specs before you plug in.
The input voltage range also shapes your charging speed. Say your power station is rated for 200W solar input—it won’t charge faster if you throw more voltage or amps at it; it’ll just ignore the extra.
Matching Voltage with Inverters and Batteries
Your inverter turns DC from panels or batteries into AC for your home. Each inverter wants a specific DC voltage range to work right.
String inverters for homes usually need 300V to 600V input. Microinverters attach to single panels and work with lower voltages, usually 25V to 55V. If your total solar panel voltage doesn’t land in the inverter’s range, nothing’s going to happen.
Your battery voltage has to line up too. A 48V battery bank needs panels set up to deliver enough voltage through the charge controller. If you mismatch, you lose efficiency or might not charge at all.
Temperature throws another variable into the mix. Cold weather bumps up panel voltage by about 0.3-0.5% for every degree below 25°C, while heat drops it. Your solar charge controller balances these swings, but you still need to design with enough headroom so you don’t blow past equipment limits on those cold, sunny mornings.
Measuring, Calculating, and Optimizing Voltage Output

Checking your solar panel’s voltage tells you if your setup’s working or if something’s off. You can measure voltage with simple tools, estimate values with easy math, and tweak your setup to get the most out of your panels.
How to Measure Solar Panel Voltage
Grab a digital multimeter to check your panel’s voltage. Set it to DC voltage mode, then touch the red probe to the positive terminal and the black to the negative.
For open-circuit voltage, measure with nothing connected to the panel. That’s your Voc, and in full sun, you’ll usually see 20-45 volts for most home panels.
To see voltage under load, hook your panel up to your inverter or battery system first, then take the reading. This number will be lower than Voc and closer to your Vmp.
Test your panels around midday, when the sun’s at its peak. Hot panels give you less voltage than cool ones, so don’t be surprised if a panel rated at 40 volts Voc only shows 35 volts on a scorching day.
Estimating Voc and Vmp Values
If you know how many cells your solar panel has, you can ballpark its voltage pretty easily. Each photovoltaic cell cranks out about 0.5 to 0.6 volts for Voc and 0.4 to 0.5 volts for Vmp.
For example, a 60-cell panel usually spits out around 30 to 36 volts Voc and 24 to 30 volts Vmp. Just multiply the number of cells by the voltage per cell. With a 72-cell panel, you’ll see something like 36 to 43 volts Voc.
The spec sheet for your panel will have the exact numbers, but these quick calculations help when you’re just sketching out a system or trying to troubleshoot. The formula V(panel) = V(oc) – I(sc) × R(int) shows how internal resistance eats away at your voltage.
Ipm (current at maximum power) teams up with Vmp to show your panel’s real power output. Most home panels have Ipm between 3 and 9 amps. Multiply Vmp by Ipm and you’ve got your wattage at peak performance.
Optimizing Voltage for Peak Performance
How you aim your panels totally changes solar panel output voltage. Point them toward the equator and tweak the tilt to match your latitude. Even a 10-degree shift can bump up voltage by 5–8% in some seasons.
Keep those panels clean—dirt and leaves block sunlight and drop your voltage. Shading is brutal; even a tiny shadow on one cell can drag down the voltage of the whole panel.
Let your panels breathe. Mount them with a gap underneath so air can cool them off. Every degree above 25°C drops your voltage by about 0.3 to 0.5%.
Grab an MPPT (maximum power point tracking) charge controller or inverter. These gadgets tweak things automatically and keep your panels humming at Vmp, pumping out max power into your batteries or the grid. Standard PWM controllers just can’t compete here.
Frequently Asked Questions

Solar panels don’t always give you the same voltage—they change depending on weather, time of day, and where you measure. If you know what causes those changes, setting up your system and fixing issues gets a lot easier.
What determines the operating voltage of a solar panel under load?
What you hook up to your panel and how much current you draw both affect the voltage under load. As soon as you connect a battery or device, the voltage drops from open-circuit down to whatever fits the resistance of your setup.
Pull more current and your panel gives you less voltage. It settles at the point where your panel’s output and your device’s needs meet up.
When you wire up more photovoltaic cells in series, you boost the starting voltage. Each cell adds about 0.58 volts. But as soon as current starts flowing, the real-world voltage drops below that theoretical total.
How do open-circuit voltage and maximum power voltage differ, and when should each be used?
Open-circuit voltage (VOC) is what you’ll see if you measure with nothing hooked up. It’s the highest voltage your panel can make under full sun, but with no current moving.
Maximum power voltage (Vmp) sits at the sweet spot—where you get the most watts out of your panel. Vmp is always lower than VOC because current flows through the circuit at that point.
You need VOC for sizing charge controllers and inverters, so you don’t fry your gear if the voltage spikes. These parts have to handle the highest voltage your panels can ever crank out.
Vmp is what matters for real power production. Your system runs near Vmp most of the time if it’s working well.
How does temperature affect a panel’s voltage output throughout the day and across seasons?
Panels lose voltage when they heat up. You’ll get the highest readings early in the morning when everything’s cool, then watch voltage slide as the sun bakes the panels.
Most panels lose about 0.3 to 0.5 percent of their voltage for every degree Celsius above 25°C. If your panel is rated at 40 volts, it could drop to 36 volts on a scorching afternoon.
Cold weather actually helps—panels run more efficiently and crank out higher voltages in winter. But, of course, you get fewer daylight hours, so your total energy drops anyway.
Check the temperature coefficient on your panel’s spec sheet. It tells you exactly how much the voltage changes as the temperature swings. Handy for planning in wild climates.
What voltage range should be expected from a panel when connected to an MPPT or PWM charge controller?
MPPT controllers are smart—they adjust the voltage to squeeze max power from your panels. Usually, they run at about 70 to 80 percent of open-circuit voltage, right where Vmp sits.
If you’ve got a 36-cell panel with 20.88V open-circuit, expect it to run around 17 to 18 volts with an MPPT controller. The controller then steps this down to whatever your batteries need.
PWM controllers just drag the panel voltage down to match your battery bank—so you’ll see 12V, 24V, or 48V depending on your setup.
PWM systems waste that extra voltage your panels could give. MPPT controllers cost more, but they’ll pull way more energy from the same panels. Worth it, honestly.
How can you measure solar panel voltage accurately with a multimeter without frying your gear?
First, set your multimeter to DC voltage mode. Pick a range that’s higher than your panel’s VOC rating. Most home panels sit under 50 volts, so 200V is usually plenty.
Grab the red probe and touch it to the positive wire. The black one goes to the negative wire. Seriously, don’t let the probes touch each other or poke both probes at the same wire—you don’t want sparks.
Try to measure when the sun’s shining bright. Shade or clouds make your voltage readings drop. Honestly, early mornings are your best bet because cool panels give you the highest voltages.
Don’t measure voltage while the panels are hooked up to batteries or charge controllers—unless you’re absolutely sure about what you’re doing. Always disconnect the panel first. That way, you get a real open-circuit reading and you won’t risk frying your controller.